Before You Begin
If your organization uses antivirus or endpoint protection software, policies may need to be updated to allow the Produce8 Agent to install and operate correctly.
📘 Reference: Antivirus & Endpoint Protection Software Guide
Follow this guide to set up the necessary policies and exclusions.
Step 1: Set Up a Device
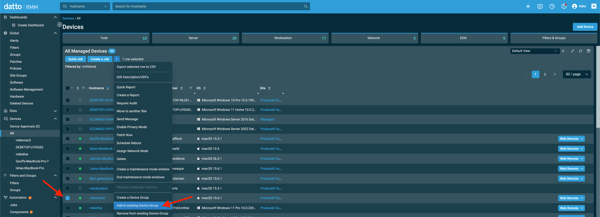
- In Datto RMM, go to Devices.
- From the device list, right-click the target machines(s).
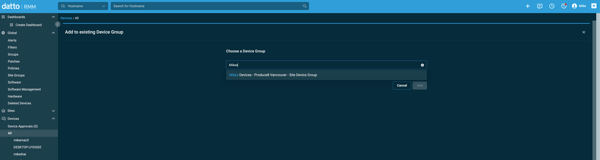
- Select Add to Device Group → Choose or create the appropriate group for deployment.
Step 2: Deploy the Produce8 Agent
There are two deployment methods.
We recommend Method 1 for most environments.
Method 1 — Recommended (Run via Component)
- Download the Installer
- Log in to the Produce8 Web App and go to My Profile → Connection Status.
- Download the .msi installer for the Produce8 Agent. Be sure to select the correct installer for your specific device.
- (Optional) Download the Desktop App Installer from the same page if you plan to include it in the deployment.
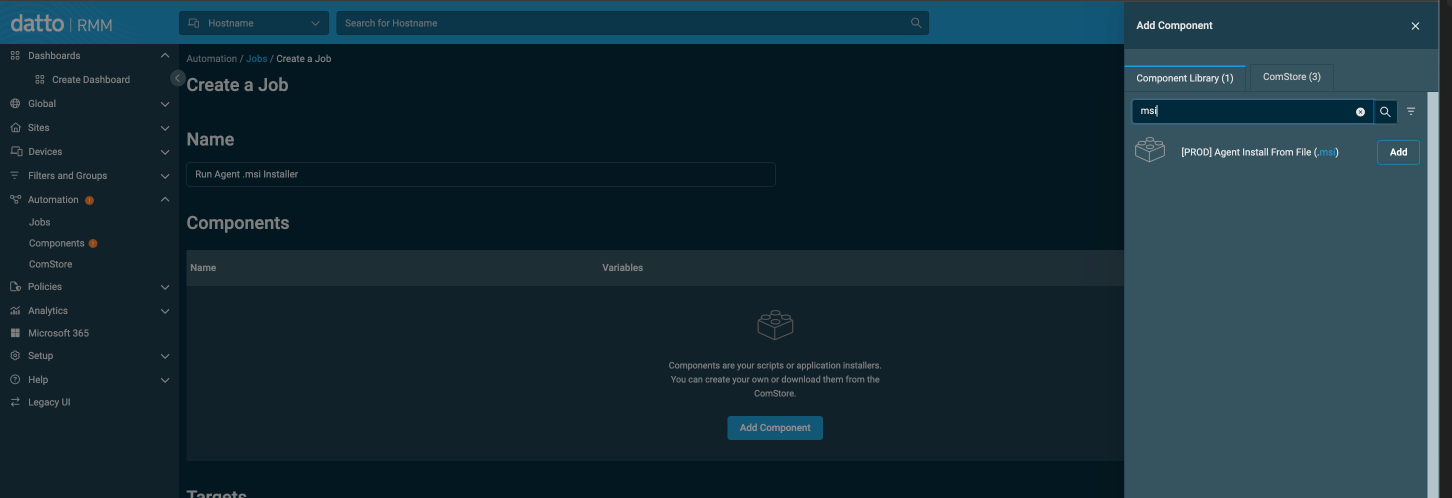
- Create a New Component in Datto
- Navigate to Automation → Components.
- Click + Add Component.
- Give your component a clear name (e.g., Produce8 Agent Install).
The example below shows how to add a new component in Datto.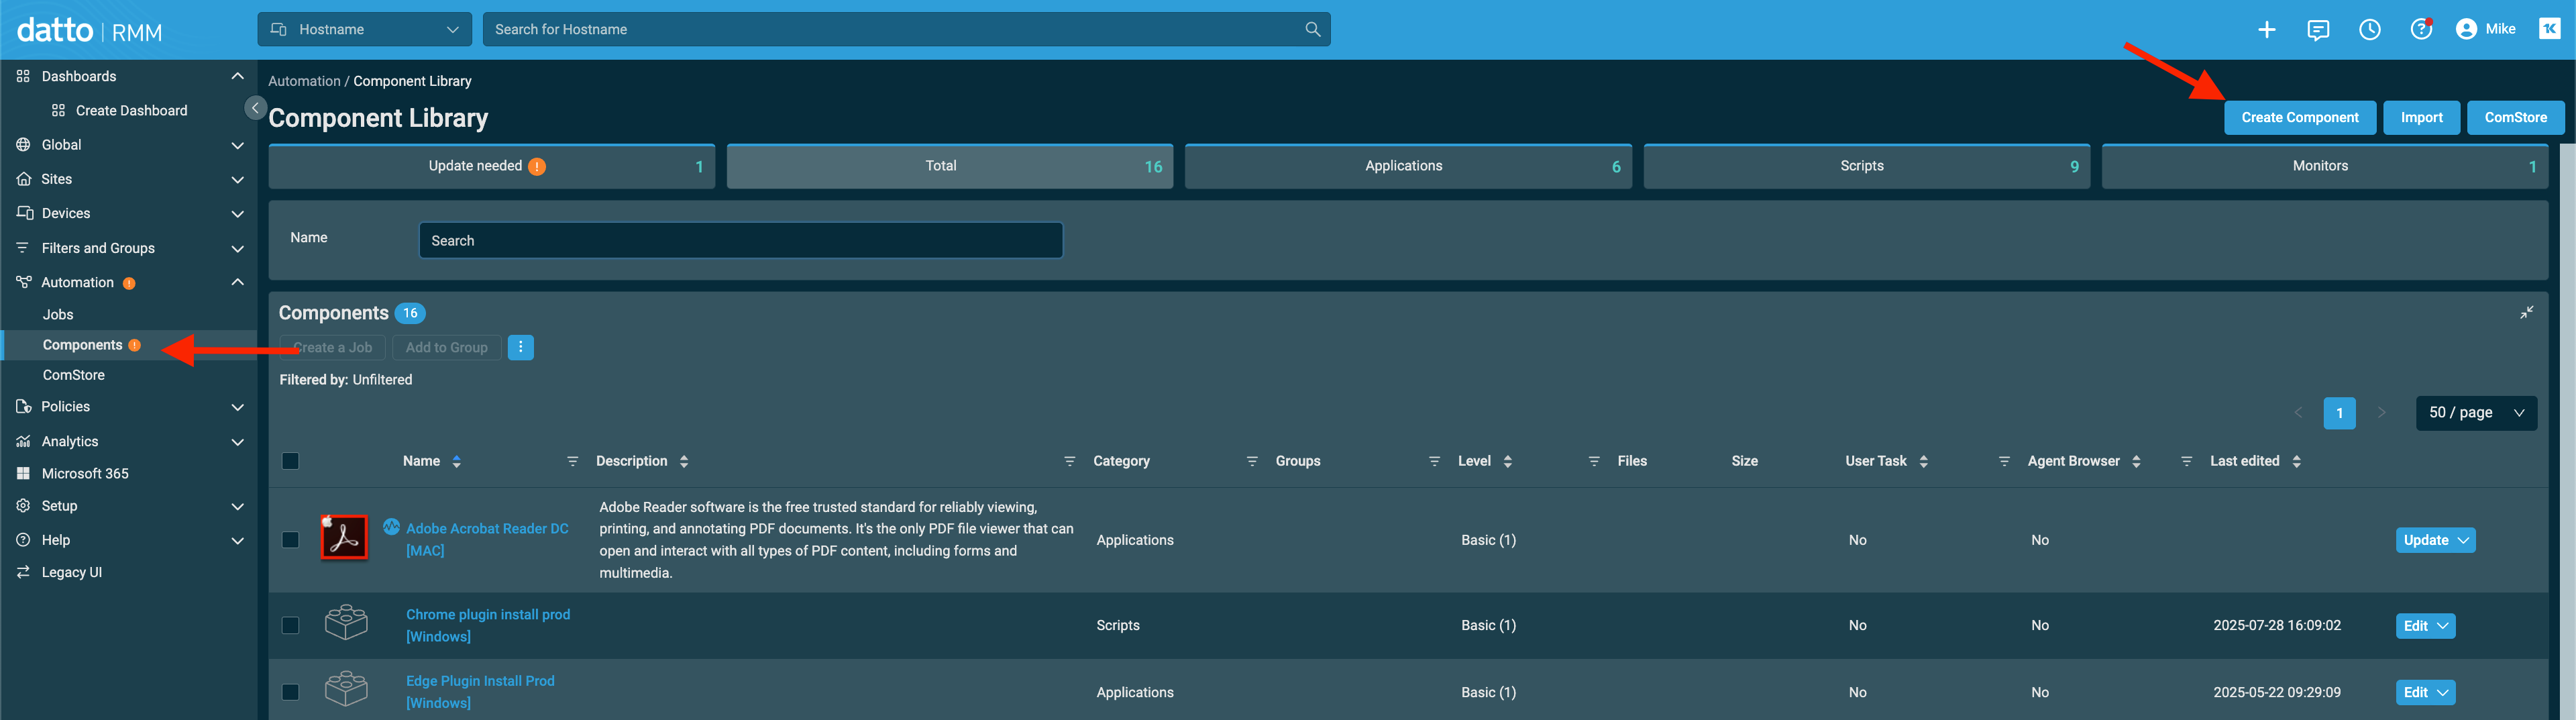
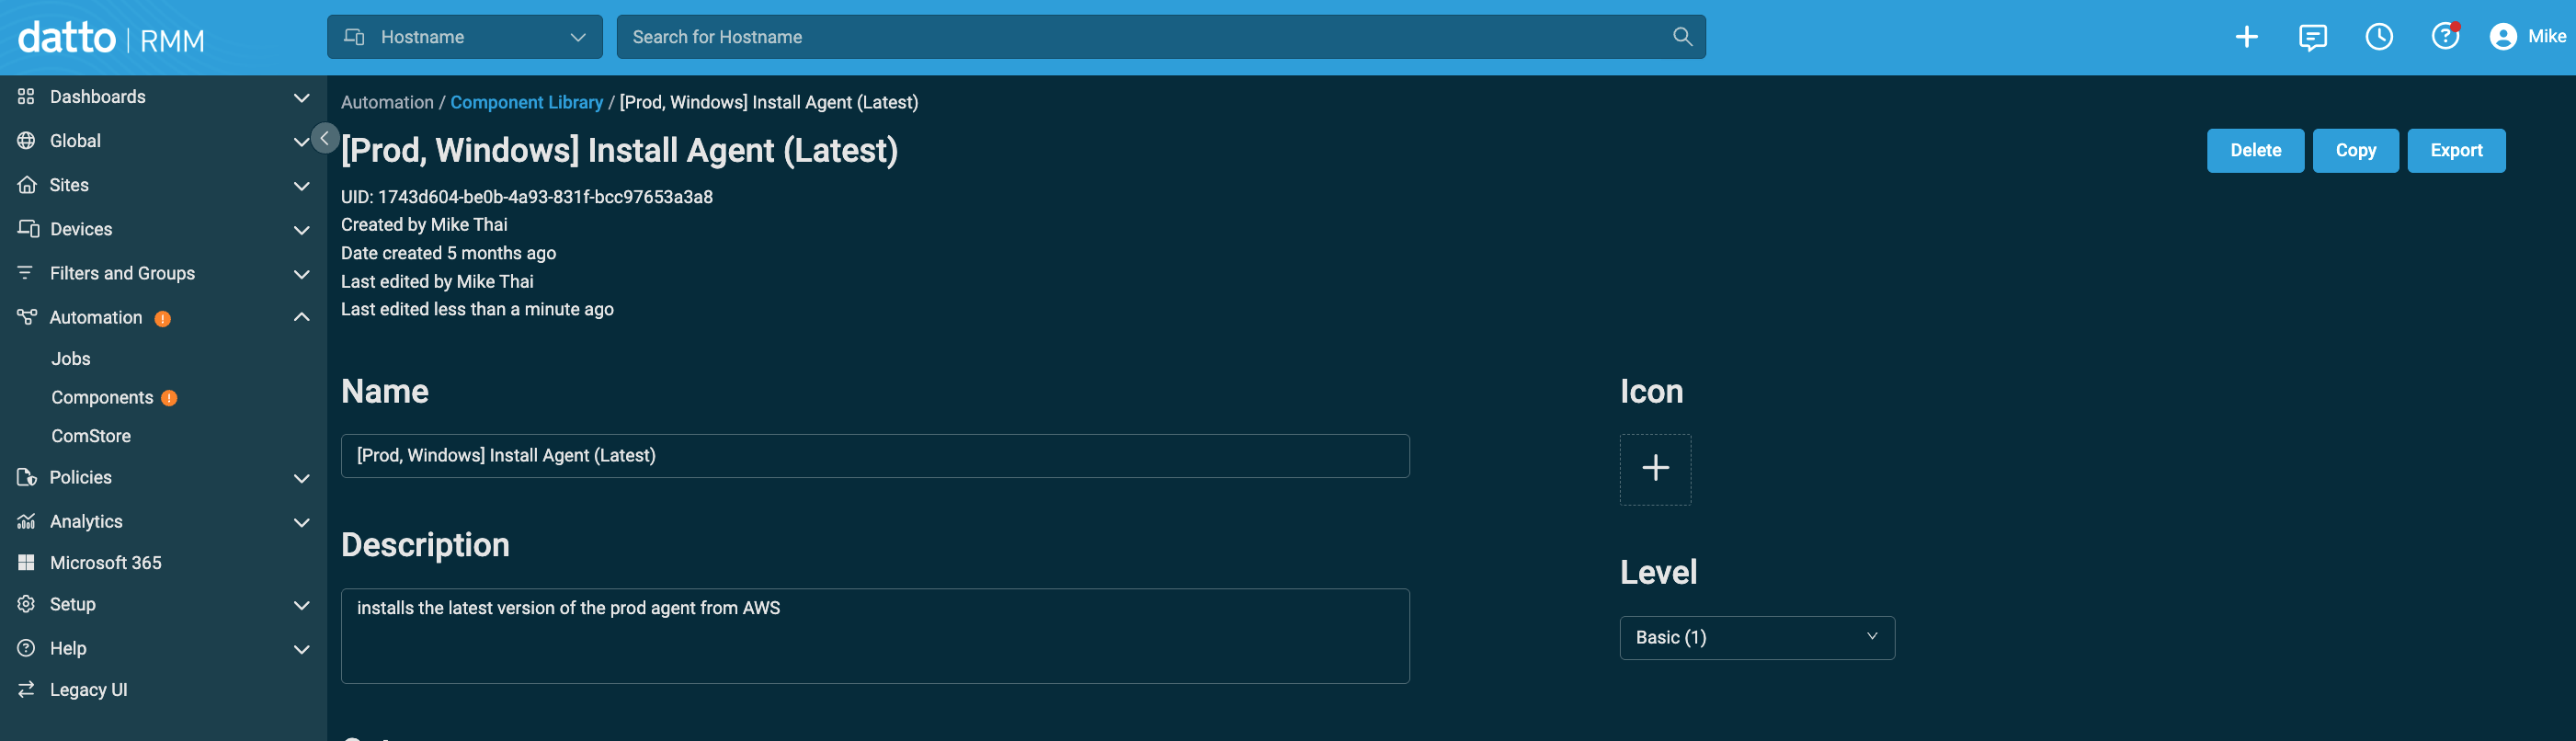
- Add the MSI Installer and Script
- Upload the
.msifile. - In the script section, paste the PowerShell command provided below to install the Agent.
# Get working directory for Datto RMM
$workingDir = Split-Path -Parent $MyInvocation.MyCommand.Definition
Write-Output "Working directory: $workingDir"

# Path to the uploaded MSI file
$msiPath = Join-Path $workingDir "Produce8-Agent-latest.msi"
Write-Output "Installing Produce8 Agent from: $msiPath"

Start-Process -Wait msiexec -ArgumentList "/i $msiPath /quiet ACCOUNTID=YOUR_ACCOUNT_ID"
- Upload the
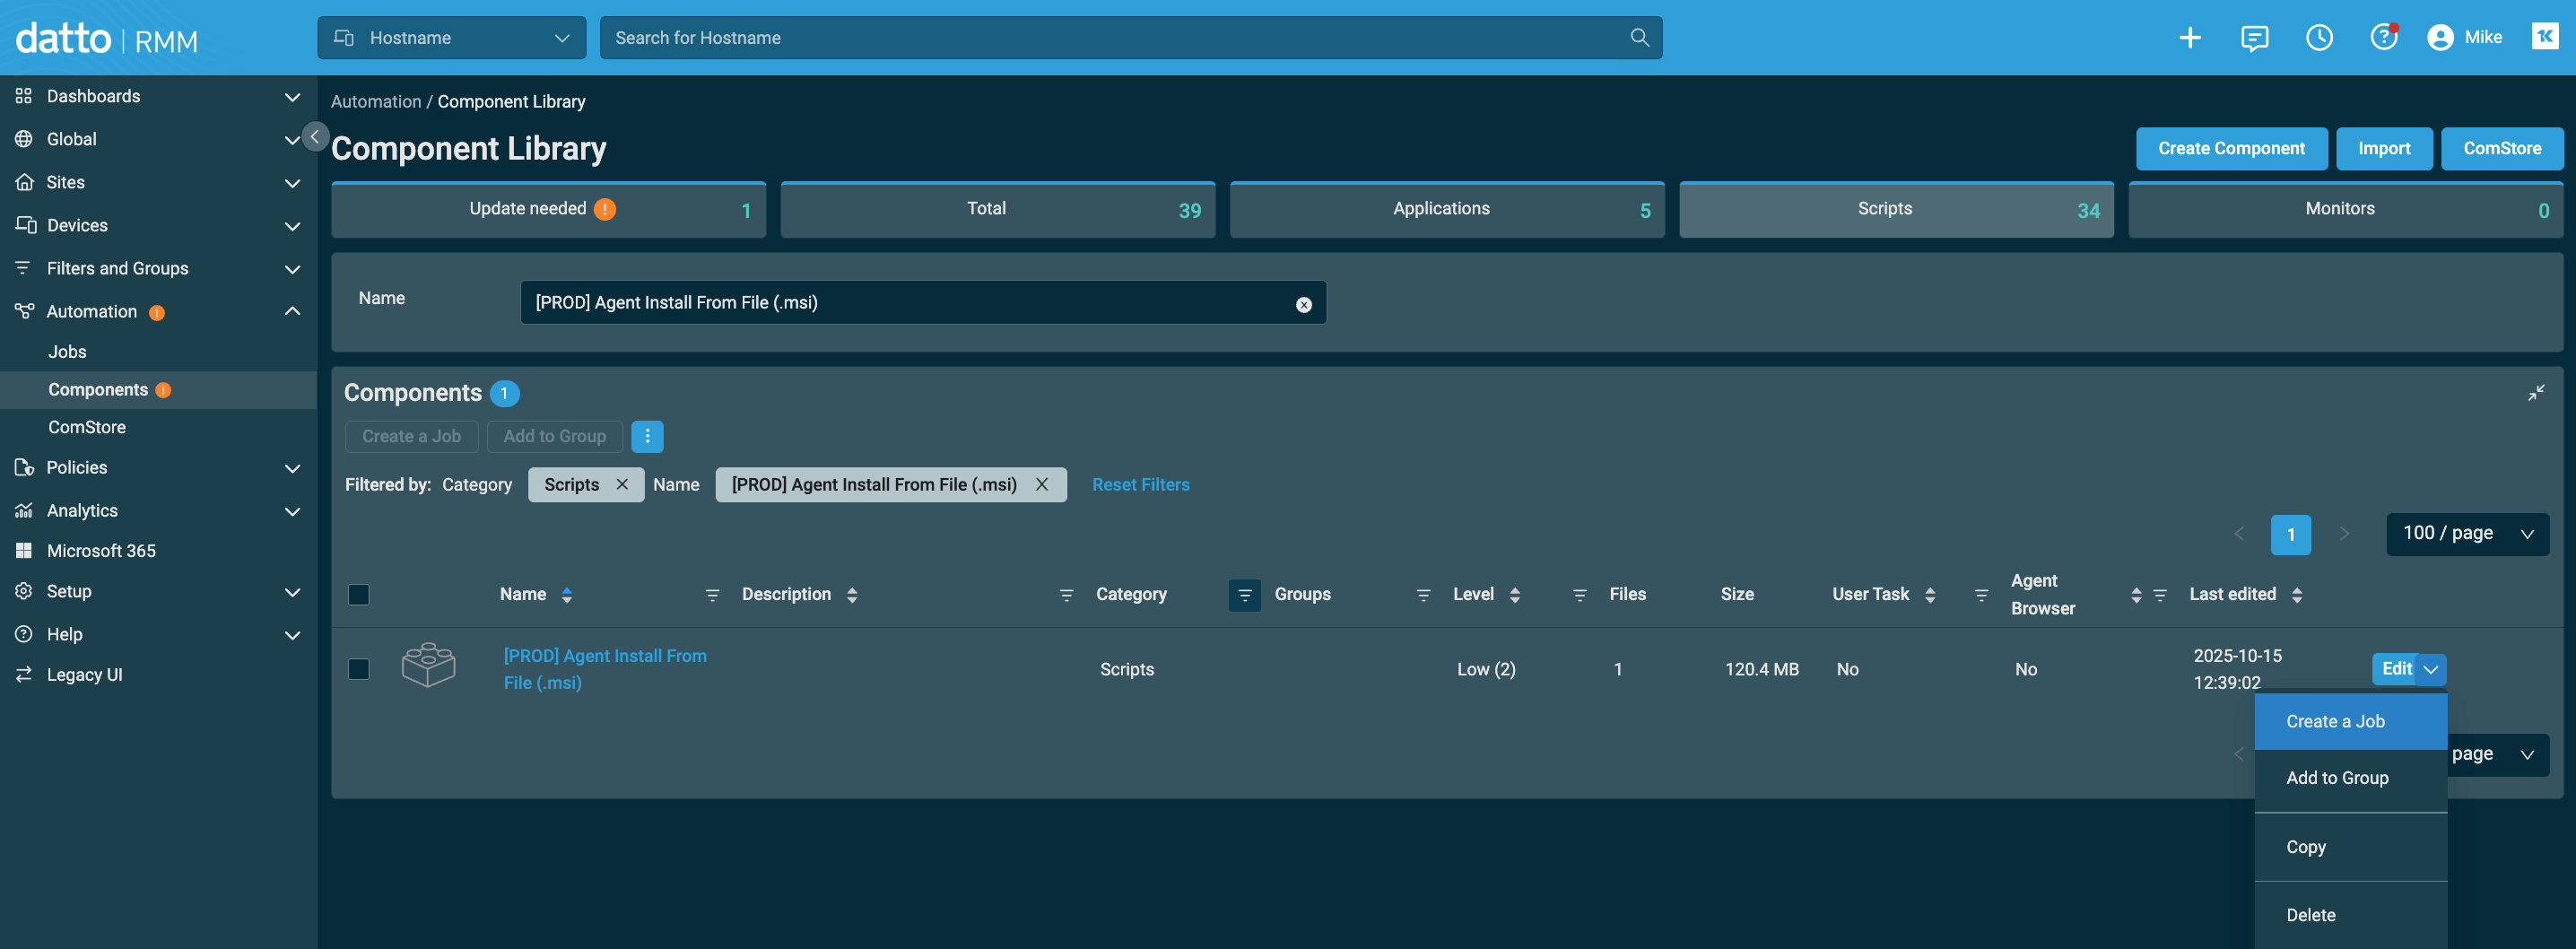
- Save and Assign the Component
- Navigate to Automation →Components
- Locate the component you just created.

- Click Edit, then select Create Job from the drop-down menu.
- Add the component to a Job under Automation → Jobs.
- Assign the target devices or groups.
- Ensure the job runs as System.
- Run the Job
- Click Create Job.
- The job will run immediately after creation.
- You can monitor progress under Automation → Jobs.
Method 2 — Run a Script
⚠️ Note: This method may be blocked by endpoint protection software. Use Method 1 when possible.
- In Datto, go to Automation → Components.

- Create a new component and select PowerShell for the scripting language.

- Paste your deployment script directly into the Script section.
- Save the component, then create a Job to assign it to the desired devices.

- Run the job and verify installation through Automation → Jobs.
- You can monitor progress of re-run the job from Automation → Jobs.
Step 3: Verify the Installation
Once the job completes:
- Check the Connection Status page in Produce8 to confirm devices appear as connected.
- Ensure the Desktop Agent shows as active.
If the agent does not appear within 15-30 minutes, confirm antivirus exceptions are configured correctly.
Need Help?
If you encounter issues generating your deployment script or running it via Datto RMM, reach out to our Customer Support team.
We're happy to assist.