Table of Contents
- What is a Shared Workspace?
- Goals for Your Shared Workspace
- Structuring Your Shared Workspace
- Create a Shared Workspace
- Navigating your Shared Workspace
- Invite Your Team to a Shared Workspace
What is a Shared Workspace?
A Shared Workspace in Produce8 brings together your team’s activities into one centralized view, enabling better collaboration, alignment, and visibility across the organization. It helps you track key team metrics, identify areas for improvement, and create collective goals that drive productivity.
Goals for Your Shared Workspace
A Shared Workspace should be designed with a clear goal in mind. Many teams use it to assess collaboration distractions—such as the impact of meetings, messaging apps, and emails—on deep focus work.
A useful metric to examine is the relationship between the number of interactions with an application versus the total time spent in that application. If a team frequently checks an app throughout the day but spends very little time in it overall, this may indicate context-switching and interruptions that reduce focus time.
By identifying these patterns, your team can make data-driven adjustments to improve communication efficiency. This might include:
- Reducing context-switching by setting dedicated response times for messaging and emails.
- Optimizing meetings to ensure they serve a clear purpose and don’t disrupt deep work.
-
Encouraging intentional use of collaboration apps—so team members engage meaningfully rather than checking them out of habit.
The goal isn’t to eliminate these tools but to use them more effectively, ensuring they support—not hinder—productive work.
Structuring Your Shared Workspaces in Produce8
Proper structure ensures alignment with team goals. There’s no single right way to organize your Shared Workspaces—choose a structure that makes the most sense for your team.
Some common approaches include:
- Location (different office locations or remote teams)
- Role (sales, marketing, customer support)
- Department (HR, finance, IT)
- Level (managers, team leads, individual contributors)
The key is to create a structure that supports visibility, collaboration, and alignment with your team’s goals.
Multiple Workspaces
Users can be members of multiple workspaces, making it easier to collaborate across teams or projects while maintaining visibility over relevant workstreams.
Assigning Permissions for Each Member in Produce8
Assigning the right roles and permissions to each member in a Shared Workspace is crucial to ensuring that everyone has the appropriate access to the necessary tools.
In Produce8, permissions can be assigned to individual users based on their roles, both within the workspace and across the platform. Ensure that each team member has the correct permissions to manage the tools and data they need for collaboration.
For more detailed instructions on permissions and roles, please see Roles & Permissions within Produce8.
Assigning Workspace Leads or Owners
Each Shared Workspace should have a designated Lead or Owner to oversee its management. This person is responsible for:
- Ensuring team members have the necessary support.
- Tracking progress and maintaining workspace alignment with team goals.
- Evaluating workflows, collaboration habits, and tool effectiveness to drive improvements.
The Lead should be someone who can assess team-wide work patterns and make informed adjustments to enhance productivity and collaboration.
Create a Shared Workspace
Setting up a Shared Workspace in Produce8 is simple.
Follow these steps:
- Log in to your Produce8 account.
-
Open the Sidebar Menu by selecting the Sidebar Menu button in the top-left corner, then select Workspaces.
-
On the Workspaces homepage, you’ll see a list of workspaces you’re a member of. To create a new workspace, select Create Workspace in the top-right corner.
-
Enter Your Workspace Details:
-
Name your workspace (e.g., “Service Team”).
-
Choose a Workspace Icon from the dropdown.
-
You’ll then be prompted to invite team members. If you prefer, you can skip this step and come back to it later.
-
-
Complete Setup: Once the workspace is created, the workspace will appear on your Workspaces homepage in the Produce8 Web App.

🎉 That's it! You've successfully set up your Shared Workspace. Now, you can configure settings, invite team members, and add relevant app subscriptions to begin working out loud.
Navigating your Shared Workspace
Your Shared Workspace is only accessible to its members, ensuring a collaborative but structured environment for your team.
To access your Shared Workspace in the Produce8 web app:
-
Log into your Produce8 account.
-
Ensure the sidebar menu is open by selecting the Sidebar Menu button in the top-left corner.
-
Select Workspaces to view a homepage listing all the workspaces you're a part of.
- Click on the Shared Workspace you want to explore.

Once inside, use the sidebar menu to navigate between the following key pages:
Workspace Dashboard
The Workspace Dashboard provides high-level insights into how your team spends time across different work activities. It includes:
- Scheduled Time in Meetings – Total time spent in external and internal meetings during the selected period, with comparisons to the previous period.
- Time in Calls – Total time spent in call-based interactions (e.g., Zoom, Slack, Microsoft Teams) during the selected period, with comparisons to the previous period.
- Top Apps – Highlights the top 5 apps used by the team, based on total duration, with comparisons to the previous period.

Timeline & Activities
The Timeline & Activities page offers a visual breakdown of how the team interacts with work apps throughout the day.

-
Timeline – Displays a daily view of work patterns across three swim lanes:
- App Views: The top lane illustrates typical activities. Look for patterns that represent specific workflows, distractions, focus time, and healthy breaks or offline activities.
- Calls: The middle lane visually represents time spent in Zoom, Slack, and Microsoft Teams calls, meetings, and huddles.
-
Calendar: The bottom lane displays both past and planned calendar entries, facilitating comparison between scheduled meetings and actual workday activities.
Understanding Swimlanes & Overlaps
An overlap between Views and Calls indicates that a team member is using other tools while on a call. This overlap could mean:
- Screen sharing or presenting during a meeting.
-
Switching between emails, messages, or other apps while on a call.
- Collaborating in a working session, where team members actively engage with shared documents or projects during a call.
The swimlanes provide context for your team’s workday activities, helping you:
- Identify periods of deep focus work versus frequent context-switching.
- Spot patterns of meeting overload or excessive multitasking.
- Understand how work happens across different tools and apps.

-
Apps & Categories – By default the timeline view is color coded by the app, but by clicking on the Box icon in the top right you can switch to the app category view, where the activities are color coded by their category rather than their apps. For details about an activity, click on it in the timeline.

Metrics
The Metrics page provides a data-driven view of how your team spends time across apps, calls, and meetings within the Shared Workspace.
Date Selector
Use the date selector to adjust the timeframe for displayed metrics. You can toggle between monthly, daily or weekly views and review current or historical data within your account’s data retention period.

Per Person Average or Workspace Total
Using the Per Person selector you can switch between looking at the data as averages per person/per day or as the totals for the selected time period.

Key Metrics & Insights
App Metrics
The App Metrics section provides a detailed breakdown of App usage, helping teams understand where their time and attention are spent.
Navigating App Metrics
- The Summary Tiles shows a summary of the most used Apps in the selected time period, grouped by the number of App users, time in the App, and interactions with the App, as well as the biggest changes since the past time period.
- The detailed breakdown table includes:
- Unique Users – The number of unique users that used the App in the selected time period
- Time in the App – Time spent actively using the App.
- Interactions with the App – The average number of interactions with the app

Clicking on any App in the table will open a time series view where you can see a historical breakdown of app usage.

Customizing Your View
Use the controls at the top of the chart to adjust the parameters of your view:

- Selected App - You can click on the app's nameto quickly switch to another app
- The metric being shown - you can switch between looking at the time in the app or the number of interactions with the app
- Average or Total Data - You can choose to show either the Daily Average or the Total for the time period
- Daily Avg - each data point in the chart will show the average use of that app per user per day
- Total - each data point will show the total for that app across all users in the workspace
Use the controls at the bottom of the chart to adjust your view:

- Chart Aggregation – Toggle between monthly, weekly, or daily totals
- Time Frame – Select a custom range (min. 1 week, max. 3 months).
App Categories
The App Categories section provides a way to show how time is distributed across different app categories (e.g., Messaging, Productivity, Meetings).
The table lists detailed breakdowns including:- Total time spent in apps within each category.
- Change from the previous period, showing increases or decreases in usage.
- Trends, allowing you to analyze time-series data for daily and weekly patterns.

Scheduled Time in Meetings
The Scheduled Time in Meetings tab displays:
- Total time spent in internal and external meetings for all workspace members.
- A count of internal and external meetings within the selected timeframe.
- A comparison to the previous period to identify trends in meeting time.
- A breakdown of meeting time by size of the meeting.

You can click on any of the metrics to see a trend chart on that metric
Time in Calls
The Time in Calls tab displays:
- Total time spent in calls across platforms like Zoom, Slack, and Microsoft Teams.
- A count of call interactions during the selected timeframe.
- A comparison to the previous period to track call volume and trends.
- A trend of the calls for the time period selected

You can click on any of the metrics to see a trend chart on that metric
Workspace Settings
The Settings page allows you to manage your Shared Workspace, including members, app subscriptions, and workspace preferences.
Accessing Workspace Settings
To access Settings in your Shared Workspace:
- Open the Sidebar Menu in the Produce8 Web App.
- Select Workspaces and navigate to your Shared Workspace.
- In the sidebar, click Settings to access configuration options.
Managing Workspace Members
The Members tab allows you to view and manage workspace participants:
- View Members — See a list of all team members in the workspace.
- Modify Roles & Permissions — Update user roles based on workspace needs.
- Add or Remove Members — Adjust the team as needed for optional collaboration.

Admin Settings
The Admin tab provides additional workspace customization options:
- Change Workspace Name — Edit the workspace title to better reflect its purpose.
- Update Workspace Icon — Select of modify the visual icon for quick identification.

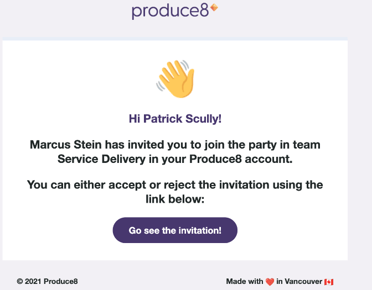
Invite Your Team to Your Shared Workspace
Before inviting your team, ensure they understand how the Shared Workspace will be used. It’s helpful to set up app subscriptions first so that members can follow relevant apps upon joining
- Log in to your Produce 8 web app account.
- Open the Sidebar Menu and select Workspaces.
- Click on the Shared Workspace you would like to invite team members to.
- Click Add Workspace Member on the right hand side.

- Choose the users in your account to invite. You can search for them by their name or email address. Only users that are already in your account can be selected here.
- (Optional) Add a personal message to the invitation.
-
Assign a permission level (Member, Lead, or Owner). [For more details, see Roles & Permissions in Produce8].
- Click Invite Users.
Team members will receive an email invitation to join the Shared Workspace.
If a Team Member Doesn’t Receive Their Invite:
•Ask them to check their Spam/Junk folder.
•If they still don’t see it, your IT team may need to whitelist produce8.com in email settings.